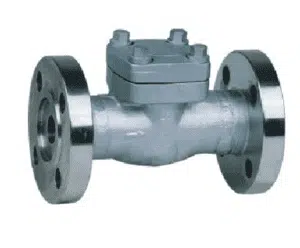
A non return check valve, sometimes called a check valve or one-way valve, lets fluid move in only one direction. You rely on a non-return valve to stop unwanted backflow, which keeps your system safe and efficient. In many industries, non return check valves protect equipment from damage and block contaminants from entering clean lines.
- Non-return valves prevent backflow and contamination in sectors like industrial processes, HVAC, power generation, and transportation.
- They help protect downstream equipment and support energy efficiency and regulatory compliance.
- Advancements in design and integration with smart systems make them even more reliable.
A clinical study of 50 infusion system samples found that using a non return check valve stopped bacterial growth, proving its role as a barrier against microorganisms. Systems in medical, industrial, and plumbing fields depend on non-return valves to keep operations safe and clean.
Key Takeaways
- Non return check valves allow fluid to flow in one direction and stop backflow automatically, protecting your system and equipment.
- Different types of check valves, like ball, swing, wafer, diaphragm, and spring types, suit various applications and fluid conditions.
- Choosing the right valve material, size, and pressure rating is crucial to ensure durability and safe operation in your system.
- Proper installation with correct flow direction and orientation prevents leaks, pressure loss, and valve failure.
- Regular inspection and maintenance help detect issues early, extend valve life, and keep your system running smoothly.
- Common problems like valve sticking, leaks, or noise often result from debris, worn parts, or incorrect installation and need prompt attention.
- Check valves work well in many industries, including water treatment, oil and gas, HVAC, and pump systems, improving safety and efficiency.
- Understand the limits of check valves, such as their one-way flow design and sensitivity to pulsating flows, to choose the best solution for your needs.
How It Works
Operating Principle
You rely on a check valve to control the direction of fluid or gas in your system. The check valve working principle is simple: it opens when the pressure on the inlet side becomes greater than the pressure on the outlet side. This pressure difference pushes the internal mechanism—such as a disc, ball, or plate—out of the way, allowing flow in one direction. When the flow stops or reverses, the mechanism returns to its closed position, blocking any movement backward. This automatic action means you do not need to operate the valve manually.
A non return check valve uses mechanical parts like hinged discs, swinging arms, or spring-loaded plates. These parts respond quickly to changes in pressure. For example, in a swing check valve, the disc swings open like a door when fluid moves forward. If the flow reverses, gravity and pressure push the disc back to seal the opening. This design ensures that you get reliable one-way flow and effective backflow prevention in many types of systems.
Key Components
Every check valve contains a few essential parts that work together to control flow:
- Body: The main casing that holds all other parts and connects to your piping.
- Disc, Ball, or Plate: The moving part that opens to let fluid pass and closes to block reverse flow.
- Seat: The surface where the disc or ball rests to form a tight seal when closed.
- Spring (in some designs): Helps push the disc or plate back into the closed position quickly.
- Hinge or Pivot (for swing types): Allows the disc to swing open and closed.
You will find that different types of check valves use these components in unique ways. For example, a lift check valve uses a disc that moves up and down, while a dual-plate valve uses two plates that fold together. The combination of these parts ensures that the valve responds quickly to changes in flow and pressure.
| Component | Function | Common Types Used In |
|---|---|---|
| Body | Houses all internal parts | All check valves |
| Disc/Ball/Plate | Moves to open or close the flow path | Swing, lift, ball, dual-plate |
| Seat | Provides a sealing surface | All check valves |
| Spring | Assists in rapid closure | Spring, non-slam, lift |
| Hinge/Pivot | Allows swinging motion | Swing check valve |
Backflow Prevention
You depend on a check valve to protect your equipment and maintain system efficiency by preventing reverse flow. When you install a non return check valve, you stop unwanted backflow that could damage pumps, contaminate clean lines, or cause pressure surges. The valve closes automatically when the flow reverses, sealing tightly against the seat. This action blocks any fluid or gas from moving backward.
Check valves operate automatically, so you do not need to monitor them constantly. Their fast response time and simple design make them reliable in many applications, from water and wastewater systems to oil, gas, and fire protection. For example, simulation results show that optimizing valve geometry can reduce pressure losses and improve flow control efficiency. Improved designs, such as swing flex check valves, can lower maximum pressure surges by 33.3% compared to traditional swing check valves and reduce slamming during sudden pump stops. These features help you maintain safe, efficient, and trouble-free operation in your system.
Non Return Check Valve Types

When you choose a check valve for your system, you face many options. Each design offers unique features and fits specific applications. Understanding the main types of check valves helps you select the right one for your needs. Here, you will learn about three of the most common types of non-return valves: ball check valve, swing check valve, and wafer check valve.
Ball Check Valve
A ball check valve uses a simple but effective design. Inside the valve body, a round ball sits on a seat. When fluid flows in the correct direction, pressure lifts the ball off the seat, allowing flow. If the flow reverses, the ball drops back onto the seat and blocks the passage. You often see this type in low-pressure systems and applications where debris might clog other designs.
Ball check valves handle thick or dirty fluids well. You find them in wastewater treatment, chemical processing, and some food and beverage systems. The ball moves freely, so you get reliable sealing with minimal maintenance. This design works best in vertical installations, where gravity helps the ball return to its seat.
Tip: Ball check valves are less likely to jam if you deal with fluids containing solids or fibers.
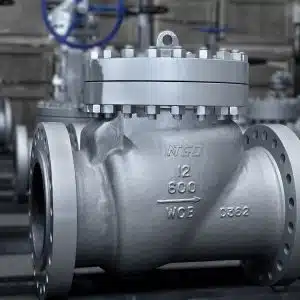
Swing Check Valve
A swing check valve features a disc attached to a hinge. When fluid enters, it pushes the disc open, letting flow pass. If the flow stops or reverses, gravity and back pressure swing the disc shut. This action prevents backflow and protects your equipment.
You often use swing check valves in water supply lines, pump systems, and fire protection networks. These valves offer minimal flow restriction, making them ideal for systems where you want to keep pressure loss low. You can install them in horizontal or vertical lines, but horizontal placement works best for most applications.
Swing check valves remain popular because of their simple construction and ease of maintenance. You can inspect and replace the disc without removing the entire valve from the pipeline.
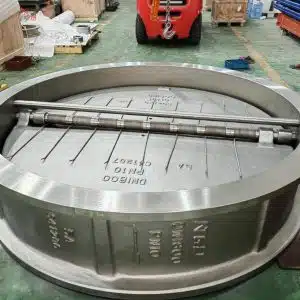
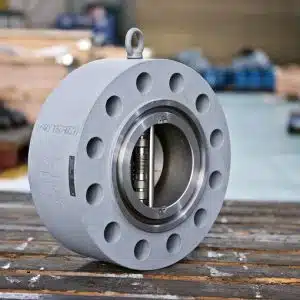
Wafer Check Valve
A wafer check valve stands out for its slim, compact shape. You install it between two pipe flanges, saving space and reducing weight. Inside, you find one or two plates that pivot or flex to allow flow in one direction. When the flow reverses, the plates snap shut, blocking backflow.
You often choose wafer check valves for HVAC systems, chemical plants, and process industries. Their low profile makes them perfect for tight spaces or retrofitting existing systems. Dual plate wafer check valves, a popular subtype, offer low pressure loss and quick closing action. This feature helps prevent water hammer, a sudden pressure surge that can damage pipes and equipment.
Note: Wafer check valves work well in both horizontal and vertical installations, giving you flexibility during system design.
Industry Trends and Performance
You see these types of check valves used across many industries. Market research shows that water and wastewater treatment, oil and gas, chemicals, pharmaceuticals, and HVAC systems all rely on these valves. Rapid urbanization and stricter safety rules drive demand for reliable check valve solutions. Manufacturers now develop smart valves with IoT features, letting you monitor performance in real time and improve efficiency.
Although each check valve type has its strengths, no direct comparative studies or statistics exist to show which performs best in every situation. You must consider your system’s needs, such as flow rate, pressure, and fluid type, when choosing among the types of check valves. Innovations continue to shape the market, with new designs focusing on sustainability, energy efficiency, and application-specific requirements.
Diaphragm Check Valve
You often choose a diaphragm check valve when you need reliable backflow prevention in low-pressure or sensitive systems. This type of check valve uses a flexible rubber or elastomer diaphragm as the main sealing element. When fluid flows in the correct direction, the pressure lifts the diaphragm, allowing flow. If the flow reverses, the diaphragm presses against the seat and blocks the passage.
You find diaphragm check valves in applications where you want to avoid contamination or where you handle corrosive or dirty fluids. The design has no metal-to-metal contact, so you reduce the risk of leaks and wear. You often see this check valve in water treatment, chemical processing, and food and beverage systems.
Tip: Diaphragm check valves work well in systems that need frequent cleaning or where you want to minimize maintenance.
Key advantages of diaphragm check valves:
- Quiet operation with minimal water hammer
- Good resistance to chemicals and debris
- Simple construction with few moving parts
You can install this check valve in both horizontal and vertical lines. The flexible diaphragm ensures a tight seal, even at low pressures. You also benefit from easy inspection and replacement of the diaphragm if needed.
Spring Type
A spring type check valve uses a spring-loaded disc or poppet to control flow direction. When fluid enters from the inlet side, it pushes against the spring and opens the valve. If the flow stops or reverses, the spring quickly forces the disc back onto the seat, sealing the passage and preventing backflow.
You often select this check valve for systems that require fast response and reliable sealing. The spring mechanism allows the valve to close rapidly, which helps you avoid water hammer and pressure surges. You find spring type check valves in pump discharge lines, compressed air systems, and heating or cooling circuits.
Main features of spring type check valves:
- Fast closing action for better protection
- Can be installed in any orientation
- Suitable for both liquids and gases
| Feature | Benefit |
|---|---|
| Spring-loaded closure | Quick response to flow changes |
| Compact design | Fits in tight spaces |
| Versatile installation | Horizontal or vertical lines |
Note: You should choose the spring material carefully to match your fluid type and temperature range.
Spring type check valves come in many sizes and materials. You can find stainless steel, brass, or plastic bodies to suit your application. The spring ensures consistent performance, even in systems with frequent starts and stops.
Other Types
You may encounter other types of check valves designed for specialized needs. Some examples include:
- Lift check valve: The disc moves up and down inside the body. You often use this type in high-pressure steam or water lines.
- Tilting disc check valve: The disc tilts open and closed, offering low pressure drop and quick response. You see this valve in large-diameter pipelines.
- Stop check valve: Combines the function of a check valve and a shut-off valve. You can manually close it for maintenance or emergencies.
- Duckbill check valve: Uses a flexible rubber sleeve shaped like a duck’s bill. It opens with forward flow and seals tightly when flow reverses. You find this type in drainage and sewage systems.
You should always match the check valve type to your system’s requirements. Each design offers unique benefits for different applications. When you understand the various types of check valves, you can make better choices for safety and efficiency.
Remember: The right check valve protects your equipment, prevents contamination, and keeps your system running smoothly.
Check Valve Applications
Pump Systems
You often use a check valve in pump systems to protect your equipment and keep your process safe. When you install a check valve on the discharge side of a pump, you stop backflow from damaging the pump or causing reverse rotation. This is important in many industrial and commercial applications. If you run a water pump, a check valve keeps water from flowing backward when the pump shuts off. This action prevents water hammer, which can damage pipes and fittings.
You also see check valves in booster pump stations. Here, they help maintain pressure and stop the system from losing prime. In multi-pump setups, a check valve keeps one pump from pushing fluid back through another idle pump. This setup improves efficiency and extends the life of your pumps.
Tip: Always install the check valve in the correct direction. Look for the flow arrow on the valve body.
Water & Wastewater
Check valves play a key role in water and wastewater applications. You use them in treatment plants, distribution networks, and drainage systems. In these settings, a check valve stops contaminated water from flowing back into clean water lines. This helps you meet health and safety standards.
In sewage lift stations, you rely on a check valve to prevent sewage from returning to the wet well when pumps stop. This keeps your system clean and reduces the risk of overflow. You also find check valves in stormwater systems. They stop floodwater from entering your pipes during heavy rain.
A check valve works well with different types of fluids, including those with solids or debris. Many water and wastewater facilities use swing or ball check valves because they handle these conditions with less clogging.
| Application Area | Purpose of Check Valve |
|---|---|
| Water treatment | Prevents backflow, protects pumps |
| Sewage systems | Stops reverse flow, reduces risk |
| Stormwater drainage | Blocks floodwater entry |
Oil & Gas
You depend on check valves in oil and gas applications to keep your fluid system safe and efficient. In pipelines, a check valve prevents product from flowing backward, which could cause contamination or pressure surges. You also use check valves in wellheads, compressor stations, and refineries.
In these environments, you often deal with high pressures and harsh chemicals. A check valve must withstand tough conditions and provide reliable sealing. You choose special materials and designs for oil and gas service, such as stainless steel or corrosion-resistant alloys.
Check valves help you control flow in both liquid and gas lines. They protect pumps, compressors, and storage tanks from damage. In emergency situations, a check valve can stop dangerous backflow and help you avoid spills or leaks.
For critical oil and gas applications, always select a check valve rated for your pressure and temperature needs.
You see check valves as essential parts of fluid control systems across many industries. Their simple design and automatic action make them a top choice for many applications.
HVAC
You depend on a check valve to keep your HVAC systems running smoothly. In heating, ventilation, and air conditioning (HVAC) applications, you use check valves to control the direction of flow in your piping. These valves stop water, steam, or refrigerant from moving backward. This action protects your equipment and keeps your building comfortable.
You often find a check valve in chilled water loops. When you run multiple chillers or pumps, a check valve prevents water from flowing the wrong way. This keeps each part of your system working as designed. You also use check valves in hot water heating systems. Here, the valve stops hot water from moving back into the boiler or mixing with cold water lines.
In air conditioning units, a check valve helps you control refrigerant flow. This keeps your compressors safe and prevents pressure surges. You also see check valves in cooling towers. These valves stop water from draining out when the system shuts down.
Tip: Always install a check valve in the correct direction. Look for the arrow on the valve body to guide you.
You choose different types of check valves for HVAC applications. A swing check valve works well in large water pipes. A spring type check valve fits tight spaces and closes quickly. You might use a wafer check valve when you need a compact solution. Each type offers unique benefits for your fluid system.
| HVAC Application | Check Valve Role |
|---|---|
| Chilled water loops | Stops reverse flow, protects chillers |
| Hot water heating | Prevents backflow to boilers |
| Air conditioning units | Controls refrigerant direction |
| Cooling towers | Stops water loss during shutdown |
You must select the right check valve for your system. Think about the size of your pipes, the type of fluid, and the pressure in your lines. You want a valve that matches your needs and lasts a long time. Regular checks help you spot problems early. If you hear noise or see leaks, inspect your check valve right away.
Check valves play a key role in many HVAC applications. They help you save energy, reduce maintenance, and keep your building safe. When you understand how a check valve works, you make better choices for your system. You keep your equipment running and avoid costly repairs.
Remember: A well-chosen check valve keeps your HVAC system efficient and reliable.
Non-Return Valve Selection
Choosing the right non-return valve for your system is essential for safety, efficiency, and long-term reliability. You need to consider several factors before making your decision. The following sections guide you through the most important criteria.
Material
You must select a check valve made from materials that match your fluid and environment. The wrong material can lead to corrosion, leaks, or contamination. Stainless steel works well for aggressive chemicals and high temperatures. Brass is a good choice for potable water and general plumbing. PVC and other plastics resist many acids and are lightweight, making them ideal for low-pressure systems. For harsh or unique environments, you may need exotic alloys, but these come at a higher cost.
Tip: Always check the compatibility of the valve material with your fluid. This step prevents early failure and keeps your system safe.
A table can help you compare common materials:
| Material | Best For | Limitations |
|---|---|---|
| Stainless Steel | Chemicals, high temp, durability | Higher cost |
| Brass | Water, air, moderate temp | Not for strong acids |
| PVC/Plastic | Corrosive, low-pressure fluids | Not for high temp/pressure |
Size & Flow
You need to match the size of your check valve to your pipeline and expected flow rates. If you choose a valve that is too small, you risk pressure drops and poor performance. If it is too large, you may face control issues or higher costs. Always check the nominal pipe size and the flow requirements of your system.
- Calculate minimum, maximum, and typical flow rates.
- Select a check valve that handles these flows without causing excessive pressure loss.
- Make sure the connection type (threaded, flanged, or welded) fits your piping.
Proper sizing ensures your non-return valve opens at the right time and prevents problems like water hammer or unstable flow. Cracking pressure, which is the minimum pressure needed to open the valve, is a key metric. You want a check valve with a cracking pressure that matches your system’s needs.
Pressure & Temperature
You must ensure your check valve can handle the maximum pressure and temperature in your system. Each non-return valve comes with a pressure rating and a temperature range. Exceeding these limits can cause leaks, deformation, or even burst the valve.
- Check the maximum operating pressure and temperature for your application.
- Remember that high temperatures can reduce the pressure rating of some materials.
- Consider thermal expansion and pressure surges when choosing your valve.
Note: Always select a non-return valve with ratings above your system’s normal operating conditions. This extra margin increases safety and extends the valve’s life.
A well-chosen check valve keeps your system safe, prevents accidents, and reduces maintenance needs. You improve durability and reliability by matching the valve’s material, size, and pressure rating to your specific application.
Orientation
You must pay close attention to the orientation when you install a check valve. The direction of flow matters for every non-return valve. If you install the valve backward, you risk blocking the flow or causing system failure. Always look for the arrow on the valve body. This arrow shows you the correct flow direction.
Some check valve types work best in horizontal lines. For example, a swing check valve often performs better when installed horizontally. Ball check valves usually fit vertical lines, especially when gravity helps the ball return to its seat. Spring-loaded check valves give you more flexibility. You can install them in any position, but you must still follow the manufacturer’s instructions.
Tip: Before you install a non-return valve, check your system layout. Make sure you have enough space for maintenance and inspection.
Proper orientation ensures that your check valve opens and closes as designed. You avoid water hammer, leaks, and pressure loss by following the correct installation practices.
Maintenance Needs
You want a check valve that matches your maintenance capabilities. Some non-return valve designs need more frequent checks and cleaning. For example, swing and ball check valves may collect debris over time. You must inspect these valves regularly to prevent clogging or sticking.
Spring type and wafer check valves often require less maintenance. Their simple design and fewer moving parts reduce the risk of failure. However, you should still schedule routine inspections. Look for signs of wear, corrosion, or leaks. Replace worn parts before they cause bigger problems.
Regular maintenance extends the life of your check valve and keeps your system safe.
Choose a non-return valve with easy access for inspection. Some models let you remove the cover or seat without taking the valve out of the pipeline. This feature saves you time and reduces downtime.
Cost Factors
You must balance performance and budget when you select a check valve. The price of a non-return valve depends on several factors:
- Material: Stainless steel costs more than PVC or brass.
- Size: Larger valves require more material and cost more.
- Design: Specialty check valves, such as those with corrosion-resistant coatings, have higher prices.
- Maintenance: Valves that need less maintenance may save you money over time.
A table can help you compare cost factors:
| Factor | Impact on Cost |
|---|---|
| Material | High for metals |
| Size | Increases with diameter |
| Design | Specialty = higher cost |
| Maintenance | Lowers long-term cost |
Note: Do not choose a check valve based only on price. A reliable non-return valve protects your equipment and prevents costly failures.
You make the best choice when you consider all these factors together. The right check valve gives you safety, efficiency, and value for your investment.
Installation & Maintenance
Pre-Installation
Before you begin any check valve installation, you need to prepare your system and the valve itself. Start by removing all transport or storage materials from inside the check valve. These materials protect the valve during shipping but can block flow if left inside. Next, check that the flapper or closure element moves freely. You want to avoid any sticking or jamming before you install the valve.
Always confirm the flow direction. Most check valves have an arrow on the body showing the correct direction. For vertical installations, make sure the flow moves upward. If you install the valve horizontally, cover the top to keep out debris. You should also measure and provide the recommended straight pipe lengths upstream of the valve. This step helps maintain smooth flow and prevents turbulence.
Tip: Follow the manufacturer’s guidelines and use qualified professionals for every check valve installation. This reduces the risk of errors and ensures long-term reliability.
Installation Steps
You can follow this step-by-step guide to checking non-return valves during installation:
- Inspect the check valve for visible damage or missing parts.
- Clean the pipeline and remove any debris or old gasket material.
- Position the check valve in the correct orientation, matching the flow arrow.
- Align the valve with the pipe flanges or threads. Avoid forcing the valve into place.
- Tighten bolts or connections evenly to prevent leaks.
- For vertical installations, confirm that the flow is upward. For horizontal installations, ensure the valve sits level.
- After installation, perform a shell test and seat closure test using water or air. These tests check for leaks and proper sealing.
A table can help you remember the main points:
| Step | What to Do |
|---|---|
| Remove materials | Take out shipping inserts |
| Check movement | Test flapper or disc for free operation |
| Confirm direction | Match flow arrow to system flow |
| Align and connect | Fit valve to pipe, tighten evenly |
| Test after install | Run shell and seat closure tests |
Note: Always follow safety procedures. Depressurize and drain the system before starting any check valve installation.
Routine Maintenance
You keep your check valve working well by following a regular maintenance routine. Clean the valve to remove debris and solid particles that can cause blockages. Lubricate moving parts to reduce friction and wear. This simple step extends the life of your valve and keeps it operating smoothly.
Inspect the check valve after installation and during scheduled maintenance. Look for leaks, worn seals, or loose bolts. Test the valve by running fluid through the system and checking for proper operation. If you find any issues, address them right away to prevent bigger problems.
Regular maintenance, such as lubrication and inspection, helps you catch minor issues early. Maintenance reports show that these actions can extend valve life beyond expected service periods. You should keep detailed logs of all maintenance activities. Training your staff in check valve maintenance ensures everyone knows what to look for and how to fix problems.
Modern tools, like maintenance scheduling software, help you track tasks and keep records. Predictive maintenance using sensors and flow meters can alert you to problems before they cause failures. By optimizing your maintenance intervals based on actual valve condition, you reduce downtime and improve reliability.
Remember: A good maintenance plan keeps your check valve in top shape and prevents costly failures.
Signs of Failure
You need to recognize the early signs of non-return valve malfunction to keep your system safe and efficient. If you spot problems early, you can avoid costly repairs and downtime. After installation, you should monitor your check valve regularly. Watch for these common warning signs:
- Unusual noises: If you hear banging, rattling, or whistling sounds, your valve may not be closing properly. These noises often signal water hammer or loose internal parts.
- Visible leaks: Water or fluid leaking around the valve body or connections points to a sealing problem. Leaks can damage equipment and waste resources.
- Reduced flow rate: If you notice a drop in system performance, your valve might be stuck or partially blocked. Debris or buildup inside the valve can restrict flow.
- Reverse flow: If fluid moves backward through the valve, the internal mechanism may have failed. This issue can lead to contamination or equipment damage.
- Frequent cycling: If your valve opens and closes too often, it may wear out faster. This can happen if the installation does not match your system’s flow conditions.
Tip: Always compare your system’s current performance to its normal operation after installation. Sudden changes often point to valve issues.
You can use this table to help identify problems:
| Symptom | Possible Cause | What to Check |
|---|---|---|
| Noise | Loose parts, water hammer | Valve seat, disc, or spring |
| Leak | Worn seals, poor fit | Gaskets, connections |
| Low flow | Blockage, stuck mechanism | Debris, valve movement |
| Backflow | Failed closure, wrong install | Flow direction, seat damage |
If you see any of these signs of non-return valve malfunction, act quickly. Inspect the valve and surrounding pipes. Clean or replace worn parts as needed. If you cannot fix the problem, consider replacing the valve. Proper installation and regular checks help prevent most failures.
Remember: Early detection keeps your system running smoothly and protects your equipment.
Troubleshooting
Not Closing
When your non-return valve does not close, you risk backflow and system damage. You might notice reduced flow, energy spikes, or your system failing to reach the set temperature. These signs often point to debris blocking the valve or a problem with the actuator. Start by shutting down the system and checking for any visible obstructions inside the valve. Remove any debris you find. Next, verify that the actuator receives the correct signals and has enough torque to move the valve. Sometimes, the valve needs lubrication or recalibration. If the valve remains stuck or faulty after these steps, you should consider replacing it.
Tip: Regular cleaning and inspection help prevent sticking and closing issues.
Leakage
Leaks around your non-return valve can cause moisture buildup, refrigerant loss, or even ice and frost near the valve. You should inspect all seals and fittings for signs of damage or wear. Damaged seals often lead to leaks, so replace them as soon as possible. If you see cracks or corrosion on the valve body, replacement may be the safest option. Always tighten connections after maintenance to prevent future leaks.
A quick reference table can help you identify and address leakage:
| Symptom | What to Check | Solution |
|---|---|---|
| Moisture or frost | Seals, fittings, valve body | Replace seals, tighten fittings |
| Refrigerant loss | Valve seat, connections | Repair or replace valve |
If you notice persistent leaks, do not ignore them. Leaks can lead to bigger problems and higher repair costs.
Noise
Unusual noises from your check valve, such as hissing, whistling, or chattering, signal a problem. These sounds often occur when the valve seat or internal parts wear out. You should listen for noise during valve movement. Inspect the valve seating and all connections. Loose fittings or damaged valve seats can cause noise and reduce performance. Tighten all connections and repair or replace any damaged parts.
Pressure relief valves sometimes make noise if they release pressure too early or fail to seat properly. Regular testing helps you catch these issues before they become serious. Well-maintained valves can last up to thirty years, but you must act quickly if you hear abnormal sounds.
Note: Addressing noise early helps you avoid system failures and keeps your operation running smoothly.
You can use this table for a quick overview of troubleshooting common non-return valve issues:
| Issue Type | Symptoms / Indicators | Troubleshooting Steps | Repair or Replacement Decisions |
|---|---|---|---|
| Not Closing | Reduced flow, energy spikes | Check for debris, verify actuator, lubricate | Clean, recalibrate, or replace valve |
| Leakage | Moisture, refrigerant, frost | Inspect seals, tighten fittings, check body | Replace seals or valve if damaged |
| Noise | Hissing, whistling, chattering | Inspect seating, tighten connections, listen | Repair or replace damaged valve seats |
Sticking
A sticking check valve can disrupt your entire system. When a valve sticks, it does not open or close as it should. You might see pressure build up, flow stop, or even hear strange noises. Sticking often happens because of dirt, rust, or mineral deposits inside the valve. Sometimes, old or worn-out parts cause the valve to jam.
You can spot a sticking valve by watching for these signs:
- The valve does not open or close smoothly.
- You notice sudden drops or spikes in pressure.
- The system takes longer to start or stop.
- You hear grinding or scraping sounds.
Tip: If you see these symptoms, act quickly. A sticking valve can lead to bigger problems, like leaks or pump damage.
Common causes of sticking:
- Debris or sediment buildup inside the valve
- Corrosion on the moving parts
- Lack of lubrication
- Worn or damaged springs and seals
- Incorrect installation or misalignment
You can use this table to help identify the cause:
| Symptom | Possible Cause | What to Check |
|---|---|---|
| Valve slow to open | Dirt or debris | Clean inside the valve |
| Valve slow to close | Weak spring | Inspect and replace spring |
| Grinding noise | Corrosion or rust | Check for rust, clean parts |
| Valve stuck shut/open | Misalignment | Reinstall or realign valve |
To fix a sticking valve, start by shutting down the system. Remove the valve and inspect it closely. Clean out any dirt or buildup. Use a soft brush or cloth to avoid scratching the parts. If you see rust, use a rust remover or replace the affected parts. Lubricate moving parts with a product recommended by the manufacturer. If the spring or seal looks worn, replace it.
Note: Always follow the manufacturer’s instructions when you take apart or reassemble the valve.
You can prevent sticking by setting up a regular cleaning and inspection schedule. Use strainers or filters upstream to catch debris before it reaches the valve. Choose the right valve material for your fluid and environment. Stainless steel resists rust better than iron or brass.
If you keep your check valves clean and well-maintained, you reduce the risk of sticking. This helps your system run smoothly and protects your equipment from damage.
Disadvantages
One-Way Only
A non return check valve allows flow in only one direction. You cannot use it when your system needs flow to move both ways. This design limits flexibility. If you need to reverse flow for cleaning, draining, or process changes, you must install extra valves or equipment. You may find this inconvenient in complex systems.
- You rely on check valves as safeguards, not as active control devices.
- If a check valve fails, it usually fails to protect your system, rather than causing a direct hazard.
- Many systems do not provide data on leakage rates or failure frequencies, making it hard for you to predict reliability.
Note: Always review your process needs before choosing a check valve. If you expect to change flow direction, consider other valve types or add manual valves for flexibility.
Not for Pulsation
Check valves do not perform well in systems with frequent pulsation or rapid flow changes. You may see problems if your pump or compressor creates pressure surges. The moving parts inside the valve—such as discs, balls, or springs—can wear out quickly under these conditions. This leads to early failure or reduced performance.
- Check valves operate in severe service conditions, with moving parts exposed to the flow stream.
- Pulsating flow can cause the valve to open and close repeatedly, increasing wear and the risk of sticking or jamming.
- You may hear noise or experience water hammer, which can damage pipes and equipment.
If your system has pulsating flow, you should look for specialized valves designed for such conditions. Regular inspection and maintenance become even more important in these setups.
Tip: Use dampeners or slow-closing valves to reduce the impact of pulsation on your check valves.
Inspection Limits
You face challenges when inspecting and maintaining non return check valves. Many installations do not allow easy access for inspection or testing. You may not notice a problem until the valve fails completely. This can lead to sudden or catastrophic failures, especially if you do not have a routine inspection program.
- Many plants do not include check valves in regular inspection and maintenance schedules.
- Latent failures often go undetected because check valves operate automatically and quietly.
- You may struggle to find reliable data on normal leakage rates or failure modes.
- API 521 does not provide standard leakage rate assumptions, so you must determine these rates yourself.
- Check valves rarely meet the standards for independent protection layers due to undetected failures.
Modern digital diagnostics and remote monitoring can help you detect problems early. These tools track valve travel, temperature, cycle count, and other parameters. Early detection allows you to shift from reactive to predictive maintenance, saving time and money. However, some diagnostics require the valve to be offline, which limits testing opportunities.
Regular inspection and remote monitoring improve reliability, but you must plan your installation to allow for future access and testing.
Performance Tips
Regular Checks
You should check your non-return valves on a regular schedule. Regular checks help you spot problems before they become serious. You can look for leaks, listen for strange noises, and feel for vibrations. These signs often mean your valve needs attention. If you find dirt or debris, clean the valve right away. You should also check the valve seat and moving parts for wear or damage.
A simple checklist can help you remember what to inspect:
- Look for leaks around the valve body and connections.
- Listen for banging, rattling, or whistling sounds.
- Check for smooth movement of the valve disc or ball.
- Inspect for rust, corrosion, or buildup inside the valve.
- Test the valve by running fluid through the system.
Tip: Set a reminder for regular inspections. This habit keeps your system safe and reduces repair costs.
Quality Choice
You need to choose high-quality non-return valves for your system. Quality valves last longer and work better. When you buy a valve, check the material, pressure rating, and manufacturer reputation. Stainless steel and brass valves often last longer than plastic ones. You should also look for valves with certifications from trusted organizations.
A comparison table can help you decide:
| Valve Material | Durability | Best Use Case |
|---|---|---|
| Stainless Steel | High | Chemicals, high temp |
| Carbon Steel | Medium | Water, air |
| Cast Iron | Low | Low-pressure fluids |
You should avoid cheap, low-quality valves. These often fail early and cost more in the long run. Always match the valve to your system’s needs. If you use the right valve, you protect your equipment and avoid downtime.
Operator Training
You must train your operators to handle non-return valves correctly. Good training helps your team spot problems early and use the valves safely. You should teach your staff how to install, inspect, and maintain each valve. Show them how to read flow direction arrows and check for proper operation.
You can use hands-on practice and simple guides. Make sure your team knows the signs of valve failure. Encourage them to report issues right away. Well-trained operators keep your system running smoothly and safely.
Remember: Training is one of the best maintenance tips for non-return valves. A skilled team prevents mistakes and extends valve life.
Documentation
You need strong documentation to keep your non-return check valves working at their best. Good records help you track performance, spot problems early, and prove compliance with safety standards. When you document every step, you make your job easier and your system safer.
Start by creating a dedicated logbook or digital file for each valve in your system. Record important details right after installation. Include the valve type, size, material, manufacturer, and serial number. Note the installation date and the exact location in your system. This information helps you identify each valve quickly during inspections or repairs.
Tip: Use a simple table to organize your valve records. This makes it easy to update and review information.
| Valve ID | Location | Type | Size | Material | Install Date | Last Service | Notes |
|---|---|---|---|---|---|---|---|
| V-101 | Pump Room 1 | Swing Check | 2″ | CF8M | 2023-01-15 | 2024-03-10 | No issues found |
| V-102 | Main Line | Ball Check | 3″ | WCB | 2022-11-20 | 2024-02-05 | Cleaned debris |
You should update your documentation every time you inspect, clean, or repair a valve. Write down the date, the work you performed, and any parts you replaced. If you notice leaks, noise, or other issues, describe them in detail. This habit helps you spot patterns and predict when a valve might need extra attention.
Keep copies of manufacturer manuals, installation guides, and warranty information with your records. These documents give you quick access to technical data and troubleshooting tips. If you use digital tools, set reminders for routine checks and maintenance. Many modern systems let you attach photos or scan QR codes for instant access to valve histories.
Note: Accurate documentation supports compliance with industry regulations. Auditors and inspectors often ask for maintenance records during reviews.
You also help your team by keeping clear records. New staff can learn about your system faster when they see detailed logs. If you ever need to replace a valve, your documentation shows exactly what you need to order.
Strong documentation saves you time, reduces mistakes, and keeps your system running smoothly. Make it a habit to record every detail. Your future self—and your equipment—will thank you.
You now understand that a non return check valve protects your system by allowing flow in one direction and stopping backflow. When you select the right type, size, and material, you avoid inefficiencies and costly failures. Regular inspection and maintenance keep your valves reliable and extend their service life.
- Proper valve selection and installation prevent leaks, pressure drops, and equipment damage.
- Routine checks and professional advice improve safety and system performance.
Always follow industry standards and consult experts for complex systems to ensure long-term reliability and efficiency.
FAQ
What is the main purpose of a non return check valve?
You use a non return check valve to let fluid flow in one direction only. This valve stops backflow, which protects your equipment and keeps your system safe.
Can you install a check valve in any position?
You can install some check valves in any position. Spring type check valves work well both vertically and horizontally. Always check the manufacturer’s instructions for the best results.
How do you know if a check valve is failing?
You may hear strange noises, see leaks, or notice reduced flow. If you spot these signs, inspect the valve right away. Early action prevents bigger problems.
What fluids can you use with check valves?
You can use check valves with water, oil, gas, air, and chemicals. Always choose a valve material that matches your fluid type to avoid corrosion or damage.
How often should you check or maintain a non return valve?
You should inspect your check valves at least once every six months. In harsh environments, check them more often. Regular maintenance helps you catch problems early.
Do check valves reduce flow or pressure?
All check valves cause some pressure drop. The amount depends on the valve type and size. You can reduce losses by choosing the right valve for your system.
Can a check valve stop water hammer?
A check valve can help reduce water hammer, especially spring-loaded or non-slam types. For best results, combine check valves with other water hammer control devices.